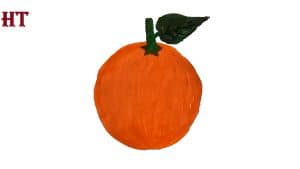
How to paint an orange step by step for beginners - How to paint an orange easy with this how-to video and step-by-step drawing instructions. Fruit drawings for beginners and everyone. Please see the drawing tutorial in the video below Video produced by channel: HTDraw You can refer to the simple step-by-step drawing guide below To make - https://htdraw.com/wp-content/uploads/2020/08/How-to-paint-a-Orange.jpg - https://htdraw.com/how-to-paint-an-orange-step-by-step-for-beginners/
How to paint an orange easy with this how-to video and step-by-step drawing instructions. Fruit drawings for beginners and everyone.

Video produced by channel: HTDraw
To make a precise drawing, you should use the orange pencil to sketch the following steps:
Step 1
Start the drawing with a simple outline of the orange oval. Try to make it symmetrical on both sides as well as top and bottom as possible.
Step 2
Add the stalk (small green end) to one side of the orange. Draw it with a star-like shape in which the ends of the star pointing more towards the viewer will be slightly larger / longer. Inside the starting shape, draw a small bump as shown in the example.
Going away from the stalk, add a few more curves to give the orange some of the "wrinkles" they normally have around that area.
Step 3
At this stage, you can draw orange lines with a black pen, highlighter, or darker pencil lines. Then you can also add a bit more of its texture with some tiny curves that almost resemble dots. Add these to the opposite side of the stalk going along the bottom right of the orange (as in the example).
If you feel confident enough, you can draw them with a pen / marker right away. If you are not sure that you will get them all in place on the first try, add them with a pencil first.
Step 4
Paint orange with anything you like (paint, crayons or highlighters). Obviously make the orange orange and make the stem green. However, leave a few small white spots on the orange for accents (light is reflected from its shiny skin). Put highlighting powder just above the legs / wrinkles a little. The reason you want a few of these white pots instead of just one large area is to emphasize the rough texture of the skin that will break the accent.
And the last thing you do is use color to make the orange stand out.
- https://htdraw.com/wp-content/uploads/2020/08/How-to-paint-a-Orange.jpg - https://htdraw.com/how-to-paint-an-orange-step-by-step-for-beginners/

Please see the drawing tutorial in the video below
Video produced by channel: HTDraw
You can refer to the simple step-by-step drawing guide below
To make a precise drawing, you should use the orange pencil to sketch the following steps:
Step 1
Start the drawing with a simple outline of the orange oval. Try to make it symmetrical on both sides as well as top and bottom as possible.
Step 2
Add the stalk (small green end) to one side of the orange. Draw it with a star-like shape in which the ends of the star pointing more towards the viewer will be slightly larger / longer. Inside the starting shape, draw a small bump as shown in the example.
Going away from the stalk, add a few more curves to give the orange some of the "wrinkles" they normally have around that area.
Step 3
At this stage, you can draw orange lines with a black pen, highlighter, or darker pencil lines. Then you can also add a bit more of its texture with some tiny curves that almost resemble dots. Add these to the opposite side of the stalk going along the bottom right of the orange (as in the example).
If you feel confident enough, you can draw them with a pen / marker right away. If you are not sure that you will get them all in place on the first try, add them with a pencil first.
Step 4
Paint orange with anything you like (paint, crayons or highlighters). Obviously make the orange orange and make the stem green. However, leave a few small white spots on the orange for accents (light is reflected from its shiny skin). Put highlighting powder just above the legs / wrinkles a little. The reason you want a few of these white pots instead of just one large area is to emphasize the rough texture of the skin that will break the accent.
And the last thing you do is use color to make the orange stand out.
- https://htdraw.com/wp-content/uploads/2020/08/How-to-paint-a-Orange.jpg - https://htdraw.com/how-to-paint-an-orange-step-by-step-for-beginners/
Nhận xét
Đăng nhận xét