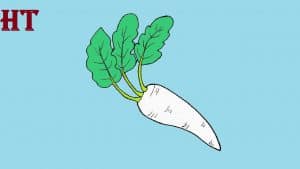
How to draw Radish Step by Step || Vegetables Drawing for Beginners - How to draw Radish easy with this how-to video and step-by-step drawing instructions. Vegetables Drawing tutorial for Beginners and kids. Please see the drawing tutorial in the video below Video produced by channel: HTDraw You can refer to the simple step-by-step drawing guide - https://htdraw.com/wp-content/uploads/2021/02/Radish-drawing-easy-for-Beginners.jpg - https://htdraw.com/how-to-draw-radish-step-by-step-vegetables-drawing-for-beginners/
How to draw Radish easy with this how-to video and step-by-step drawing instructions. Vegetables Drawing tutorial for Beginners and kids.

Video produced by channel: HTDraw
Step 1
The first step of the instruction on how to draw a radish will begin with the most simple geometric shape, similar to a circle, or even rather an oval. Perform this and the next two steps using the easiest lines.
Step 2
At the top, mark the location of the stem. At the bottom of the simple geometric shape mark a long and slightly curving “tail” of the radish.
Step 3
Very simple, but no less important stage of the lesson on how to draw a radish. In the third stage, using several simple and not long lines, separate the stems.
Step 4
Now we will make our turnip drawing more complete and clean. To do this, systematically trace all the details using clear and finishing lines. With the help of an eraser, get rid of all unnecessary guidelines that we drew in the initial stages.
Step 5
Imagine that the light falls on the left side, it means that we will add shadows to the right side of our radish picture. Do this using dense and uniform hatching, as did the artists of HTDraw.com.
So let’s go back to the subject of still lifes. Try to draw a vegetable, shown above next to cucumbers, eggplants and a vase of grapes. Or create your own combination of products. You can also add drapery or a bottle of water. Try to combine and change the location of parts on your still life. Study other articles about vegetables and fruits, and improve your drawing skills with drawing tutorials from HTDraw.com.
- https://htdraw.com/wp-content/uploads/2021/02/Radish-drawing-easy-for-Beginners.jpg - https://htdraw.com/how-to-draw-radish-step-by-step-vegetables-drawing-for-beginners/

Please see the drawing tutorial in the video below
Video produced by channel: HTDraw
You can refer to the simple step-by-step drawing guide below
Step 1
The first step of the instruction on how to draw a radish will begin with the most simple geometric shape, similar to a circle, or even rather an oval. Perform this and the next two steps using the easiest lines.
Step 2
At the top, mark the location of the stem. At the bottom of the simple geometric shape mark a long and slightly curving “tail” of the radish.
Step 3
Very simple, but no less important stage of the lesson on how to draw a radish. In the third stage, using several simple and not long lines, separate the stems.
Step 4
Now we will make our turnip drawing more complete and clean. To do this, systematically trace all the details using clear and finishing lines. With the help of an eraser, get rid of all unnecessary guidelines that we drew in the initial stages.
Step 5
Imagine that the light falls on the left side, it means that we will add shadows to the right side of our radish picture. Do this using dense and uniform hatching, as did the artists of HTDraw.com.
So let’s go back to the subject of still lifes. Try to draw a vegetable, shown above next to cucumbers, eggplants and a vase of grapes. Or create your own combination of products. You can also add drapery or a bottle of water. Try to combine and change the location of parts on your still life. Study other articles about vegetables and fruits, and improve your drawing skills with drawing tutorials from HTDraw.com.
- https://htdraw.com/wp-content/uploads/2021/02/Radish-drawing-easy-for-Beginners.jpg - https://htdraw.com/how-to-draw-radish-step-by-step-vegetables-drawing-for-beginners/
Nhận xét
Đăng nhận xét