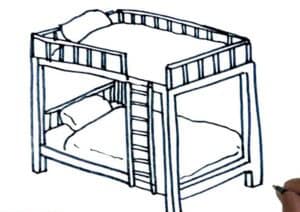
How to Draw a Bunk Bed Step by Step - How to Draw a Bunk Bed with this how-to video and step-by-step drawing instructions. Learn to draw for beginners and everyone. Please see Bunk Bed drawing tutorial in the video below So I'm happy to bring to your attention this useful and fascinating drawing lesson in which I want to tell - https://htdraw.com/wp-content/uploads/2023/01/How-to-Draw-a-Bunk-Bed.jpg - https://htdraw.com/how-to-draw-a-bunk-bed-step-by-step/
How to Draw a Bunk Bed with this how-to video and step-by-step drawing instructions. Learn to draw for beginners and everyone.

So I'm happy to bring to your attention this useful and fascinating drawing lesson in which I want to tell and show you how to draw a bunk bed step by step. In this lesson, you can practice drawing geometric elements like lines and arcs. If you want your drawing to look nicer and neater, you can use a ruler to draw straight lines.
A bunk bed is a bed with two tiers, i.e. one bed in one design sits above the other. These beds are designed to save space in the room. Most often, furniture workshops make bunk beds for teenage children. Bunk beds are most commonly used in dormitory areas, barracks, inns. To protect the sleeper from falling from the upper floors, protective arcs may be used, and stairs may be used to facilitate ascending and descending.
By learning how to draw a bunk bed with the help of this drawing lesson, you will be able to represent it as a main object in your drawing, as well as draw a bedroom and complement your drawing. you picture of this bed. Right now you can prepare the art materials you will need to draw a bunk bed, then I recommend you continue with this tutorial. I am sure that you will easily cope with this work and enjoy the creative process.
Step 1. Draw lines for the upper and lower floors of the bed.
To complete this step, draw four parallel horizontal lines of the same length.
Step 2. Add the headboard.
On the edges of the lines, draw parallel vertical lines and connect their ends.
Step 3. Describe the contours of the pillows on the bed.
Add two identical elements using lines and arcs, as shown in the figure.
Step 4. Outline the top of the quilt.
Besides the painted pillows, add similar elements on the upper and lower tiers of the bed.
Step 5. Finish pulling the blanket over the bunk bed.
Draw two parallel horizontal lines as shown.
Step 6. Start drawing the ladder on the bunk bed.
Draw two identical elements on the side of the bed using parallel vertical lines and arcs.
Step 7. Draw some steps on the stairs.
Between drawn elements, add steps using parallel horizontal lines.
Step 8. Finish drawing steps.
Continue drawing parallel horizontal lines of the same length.
Step 9. Color the drawing.
To color the bunk bed, use shades of brown as well as green.
You can see more drawing:
- https://htdraw.com/wp-content/uploads/2023/01/How-to-Draw-a-Bunk-Bed.jpg - https://htdraw.com/how-to-draw-a-bunk-bed-step-by-step/

Please see Bunk Bed drawing tutorial in the video below
So I'm happy to bring to your attention this useful and fascinating drawing lesson in which I want to tell and show you how to draw a bunk bed step by step. In this lesson, you can practice drawing geometric elements like lines and arcs. If you want your drawing to look nicer and neater, you can use a ruler to draw straight lines.
A bunk bed is a bed with two tiers, i.e. one bed in one design sits above the other. These beds are designed to save space in the room. Most often, furniture workshops make bunk beds for teenage children. Bunk beds are most commonly used in dormitory areas, barracks, inns. To protect the sleeper from falling from the upper floors, protective arcs may be used, and stairs may be used to facilitate ascending and descending.
By learning how to draw a bunk bed with the help of this drawing lesson, you will be able to represent it as a main object in your drawing, as well as draw a bedroom and complement your drawing. you picture of this bed. Right now you can prepare the art materials you will need to draw a bunk bed, then I recommend you continue with this tutorial. I am sure that you will easily cope with this work and enjoy the creative process.
Bunk Bed Drawing Step by Step
Step 1. Draw lines for the upper and lower floors of the bed.
To complete this step, draw four parallel horizontal lines of the same length.
Step 2. Add the headboard.
On the edges of the lines, draw parallel vertical lines and connect their ends.
Step 3. Describe the contours of the pillows on the bed.
Add two identical elements using lines and arcs, as shown in the figure.
Step 4. Outline the top of the quilt.
Besides the painted pillows, add similar elements on the upper and lower tiers of the bed.
Step 5. Finish pulling the blanket over the bunk bed.
Draw two parallel horizontal lines as shown.
Step 6. Start drawing the ladder on the bunk bed.
Draw two identical elements on the side of the bed using parallel vertical lines and arcs.
Step 7. Draw some steps on the stairs.
Between drawn elements, add steps using parallel horizontal lines.
Step 8. Finish drawing steps.
Continue drawing parallel horizontal lines of the same length.
Step 9. Color the drawing.
To color the bunk bed, use shades of brown as well as green.
You can see more drawing:
How to Draw a Van Step by Step
How to Draw a Wheelchair Step by Step
How to Draw Christmas Sock for Beginners
- https://htdraw.com/wp-content/uploads/2023/01/How-to-Draw-a-Bunk-Bed.jpg - https://htdraw.com/how-to-draw-a-bunk-bed-step-by-step/
Nhận xét
Đăng nhận xét