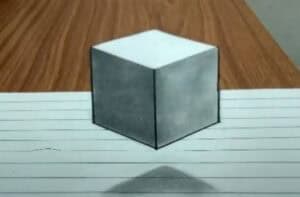
How to Draw a 3D Cube Step by Step - How to Draw a 3D Cube with this how-to video and step-by-step drawing instructions. Pencil drawing tutorials easy for beginners and all. Please see 3D Cube drawing tutorial in the video below In this drawing lesson you will learn how to draw 3D cube step by step. You'll also be able to - https://htdraw.com/wp-content/uploads/2023/02/How-to-Draw-a-3D-Cube.jpg - https://htdraw.com/how-to-draw-a-3d-cube-step-by-step/
How to Draw a 3D Cube with this how-to video and step-by-step drawing instructions. Pencil drawing tutorials easy for beginners and all.

In this drawing lesson you will learn how to draw 3D cube step by step. You'll also be able to apply the skills learned in this drawing lesson to your future artwork.
You probably know what a cube looks like. A cube is a three-dimensional solid object bounded by six square faces or sides, with three intersection points at each vertex.
Now you can prepare the necessary drawing materials and start drawing step by step.
Step 1. Draw one side of the cube.
You can do this step by drawing a vertical line.
Step 2. Add two more cube edges.
Draw two lines to the right and left of the previously drawn line.
Step 3. Draw the bottom two sides of the cube.
Connect the previously drawn lines together with two straight lines.
Step 4. Draw the top two sides of the cube.
Outline the corner at the top of the cube using straight lines.
Step 5. Add the last two edges of the 3d cube.
Draw it as an angle above the previously drawn corner at the top of the cube.
Step 6. Delete unnecessary lines.
Use an eraser to erase extra lines that appear during drawing.
Step 7. Color the drawing.
You can use different shades of gray to color the 3D solid.
- https://htdraw.com/wp-content/uploads/2023/02/How-to-Draw-a-3D-Cube.jpg - https://htdraw.com/how-to-draw-a-3d-cube-step-by-step/

Please see 3D Cube drawing tutorial in the video below
In this drawing lesson you will learn how to draw 3D cube step by step. You'll also be able to apply the skills learned in this drawing lesson to your future artwork.
You probably know what a cube looks like. A cube is a three-dimensional solid object bounded by six square faces or sides, with three intersection points at each vertex.
Now you can prepare the necessary drawing materials and start drawing step by step.
3D Cube drawing Step by Step
Step 1. Draw one side of the cube.
You can do this step by drawing a vertical line.
Step 2. Add two more cube edges.
Draw two lines to the right and left of the previously drawn line.
Step 3. Draw the bottom two sides of the cube.
Connect the previously drawn lines together with two straight lines.
Step 4. Draw the top two sides of the cube.
Outline the corner at the top of the cube using straight lines.
Step 5. Add the last two edges of the 3d cube.
Draw it as an angle above the previously drawn corner at the top of the cube.
Step 6. Delete unnecessary lines.
Use an eraser to erase extra lines that appear during drawing.
Step 7. Color the drawing.
You can use different shades of gray to color the 3D solid.
You can see more drawing:
How to draw 3D Hole Step by Step
Bridge Drawing Step by Step Tutorial || 3D Drawing
Soccer Football Drawing Step by Step – 3D drawing tutorial
- https://htdraw.com/wp-content/uploads/2023/02/How-to-Draw-a-3D-Cube.jpg - https://htdraw.com/how-to-draw-a-3d-cube-step-by-step/
Nhận xét
Đăng nhận xét