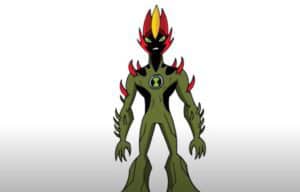
How to Draw Swampfire from Ben 10 - How to Draw Swampfire from Ben 10 with this how-to video and step by step drawing instructions. Ben 10 characters drawing tutorial for beginners and all. Please see the drawing tutorial in the video below You can refer to Swampfire simple step by step drawing guide below Step 1: Basic - https://htdraw.com/wp-content/uploads/2023/09/How-to-Draw-Swampfire-from-Ben-10.jpg - https://htdraw.com/how-to-draw-swampfire-from-ben-10/
How to Draw Swampfire from Ben 10 with this how-to video and step by step drawing instructions. Ben 10 characters drawing tutorial for beginners and all.

Start by drawing a rough outline of the Swampfire's body. Start with a circle for the head and a larger oval for the body. Swampfire has a bulky, plant-like appearance, so keep that in mind as you sketch the basic shapes.
Add facial features in the circle you drew for the head. Draw two vertical lines in the center to help position the eyes. Then draw the eyes into an almond-shaped oval and add a curved line below them to make the mouth. Swampfire has a skeleton-like structure on its face, so use a reference image to note this detail.
Sketch of Swampfire's arms and legs. His limbs are thick and muscular, with plant-like growths and vines covering them. Pay attention to the details on his arms where the fingers are sharp and pointed.
Draw the chest and abdomen area, noting the texture and details like the tree. Swampfire's body is covered with bark-like textures.
Extend vines and leaves from various parts of Swampfire's body. This is an important part of his design. Add long, curved vines with pointed leaves that grow from the dog's back, arms, and legs.
Refined Swampfire's facial details, including fiery eyes and head texture. Add more texture to his body, paying attention to bark-like textures, and adding vines and leaves as needed.
If you are confident with your pencil sketch, you can use a pen or a fine-tipped marker to ink over the lines to make the drawing stand out. Wait for the ink to dry then erase the pencil lines.
Swampfire comes mainly in green and black, but you can use colored pencils or markers to add depth and color to your drawings. Shade the body with darker green or black in shadowed areas and use lighter green for highlights.
Consider adding a background to your drawing. You can place Swampfire in a swampy environment with fog and water to give the drawing a more atmospheric feel.
Take some time to review your drawing and make any necessary adjustments. Erase any remaining pencil lines and add any final details or highlights.
- https://htdraw.com/wp-content/uploads/2023/09/How-to-Draw-Swampfire-from-Ben-10.jpg - https://htdraw.com/how-to-draw-swampfire-from-ben-10/

Please see the drawing tutorial in the video below
You can refer to Swampfire simple step by step drawing guide below
Step 1: Basic outline
Start by drawing a rough outline of the Swampfire's body. Start with a circle for the head and a larger oval for the body. Swampfire has a bulky, plant-like appearance, so keep that in mind as you sketch the basic shapes.
Step 2: Facial features
Add facial features in the circle you drew for the head. Draw two vertical lines in the center to help position the eyes. Then draw the eyes into an almond-shaped oval and add a curved line below them to make the mouth. Swampfire has a skeleton-like structure on its face, so use a reference image to note this detail.
Step 3: Content details
Sketch of Swampfire's arms and legs. His limbs are thick and muscular, with plant-like growths and vines covering them. Pay attention to the details on his arms where the fingers are sharp and pointed.
Step 4: Body
Draw the chest and abdomen area, noting the texture and details like the tree. Swampfire's body is covered with bark-like textures.
Step 5: Vines and leaves
Extend vines and leaves from various parts of Swampfire's body. This is an important part of his design. Add long, curved vines with pointed leaves that grow from the dog's back, arms, and legs.
Step 6: Complete details
Refined Swampfire's facial details, including fiery eyes and head texture. Add more texture to his body, paying attention to bark-like textures, and adding vines and leaves as needed.
Step 7: Fill ink (Optional)
If you are confident with your pencil sketch, you can use a pen or a fine-tipped marker to ink over the lines to make the drawing stand out. Wait for the ink to dry then erase the pencil lines.
Step 8: Color (Optional)
Swampfire comes mainly in green and black, but you can use colored pencils or markers to add depth and color to your drawings. Shade the body with darker green or black in shadowed areas and use lighter green for highlights.
Step 9: Background (Optional)
Consider adding a background to your drawing. You can place Swampfire in a swampy environment with fog and water to give the drawing a more atmospheric feel.
Step 10: Final steps
Take some time to review your drawing and make any necessary adjustments. Erase any remaining pencil lines and add any final details or highlights.
You can see more ben 10 characters drawing:
- https://htdraw.com/wp-content/uploads/2023/09/How-to-Draw-Swampfire-from-Ben-10.jpg - https://htdraw.com/how-to-draw-swampfire-from-ben-10/
Nhận xét
Đăng nhận xét