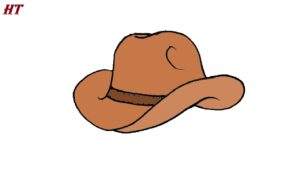
How to draw a cowgirl hat step by step - How to draw a cowgirl hat with this how to video and step by step drawing instructions. I created this lesson especially for beginner artists who still have little drawing experience, as well as for children. Please see the drawing tutorial in the video below You can refer to the simple - https://htdraw.com/wp-content/uploads/2024/04/How-to-draw-a-cowgirl-hat.jpg - https://htdraw.com/how-to-draw-a-cowgirl-hat-step-by-step/
How to draw a cowgirl hat with this how to video and step by step drawing instructions. I created this lesson especially for beginner artists who still have little drawing experience, as well as for children.

Step 1. Start drawing the brim of the hat.
To complete this simple step, you just need to draw a curved line.
Step 2. Add the bottom of the brim.
To do this, continue the previously drawn line with a circle.
Step 3. Draw the brim outline on the left side.
Extend the line drawn in the first step with another rounded curve.
Step 4. Add another border for the bottom part of the brim.
Connect the lines you drew in the second and previous steps using curves.
Step 5. Start drawing the top part of the cowgirl hat.
The element description on the left side is represented as a curve.
Step 6. Finish the top hem of the hat.
To do this step, draw a curved line on the right side of the top of the hat.
Step 7. Picture the ribbon on the cowgirl hat.
In the middle of the hat add two curved lines of different lengths.
Step 8. Make the hat look bulky.
To make the hat look more realistic, add a short curved line at the top of it.
Step 9. Color the drawing.
To color this cowgirl hat, you should use different shades of brown.
Now you know how to draw a cowboy hat step by step. Write a review about your impressions of this drawing lesson and don't forget to subscribe to us on social networks.

Please see the drawing tutorial in the video below
You can refer to the simple step-by-step drawing guide below
Step 1. Start drawing the brim of the hat.
To complete this simple step, you just need to draw a curved line.
Step 2. Add the bottom of the brim.
To do this, continue the previously drawn line with a circle.
Step 3. Draw the brim outline on the left side.
Extend the line drawn in the first step with another rounded curve.
Step 4. Add another border for the bottom part of the brim.
Connect the lines you drew in the second and previous steps using curves.
Step 5. Start drawing the top part of the cowgirl hat.
The element description on the left side is represented as a curve.
Step 6. Finish the top hem of the hat.
To do this step, draw a curved line on the right side of the top of the hat.
Step 7. Picture the ribbon on the cowgirl hat.
In the middle of the hat add two curved lines of different lengths.
Step 8. Make the hat look bulky.
To make the hat look more realistic, add a short curved line at the top of it.
Step 9. Color the drawing.
To color this cowgirl hat, you should use different shades of brown.
Now you know how to draw a cowboy hat step by step. Write a review about your impressions of this drawing lesson and don't forget to subscribe to us on social networks.
Nhận xét
Đăng nhận xét