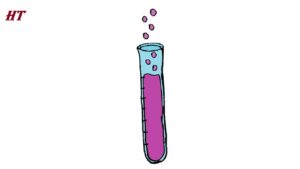
How to draw a Test Tube Step by Step - How to draw a Test Tube with this how to video and step by step drawing instructions. Expect 6 easy steps to follow, you will enjoy making their own science lab test tube on paper. Also included is a downloadable version of this drawing lesson. Please see the drawing tutorial in the video - https://htdraw.com/wp-content/uploads/2024/04/How-to-draw-a-Test-Tube.jpg - https://htdraw.com/how-to-draw-a-test-tube-step-by-step/
How to draw a Test Tube with this how to video and step by step drawing instructions. Expect 6 easy steps to follow, you will enjoy making their own science lab test tube on paper. Also included is a downloadable version of this drawing lesson.

Step 1. Draw the mouth of the test tube
Begin by drawing two ovals to form the mouth of the test tube.
Step 2. Sketch the shape of the test tube
Outline the body of the test tube by drawing an elongated U shape.
Step 3. Add liquid chemicals
Add the liquid chemical into the test tube by drawing a U-shaped line following the shape of the tube. Then, draw a wavy horizontal line on top to represent the surface of the liquid.
Step 4. Sketch the scale
Mark the measuring scale on the side of the test tube by drawing evenly spaced horizontal lines to represent the measuring lines.
Step 5. Draw bubbles
Draw bubbles coming out of the test tube by drawing circles of different sizes.
Step 6. Complete the test tube drawing
Make your test tube drawing lively and interesting! Use a light blue pencil to color the tube, giving it a transparent appearance. Then, use a pink pen to fill in the bubbles and liquid inside the tube.
- https://htdraw.com/wp-content/uploads/2024/04/How-to-draw-a-Test-Tube.jpg - https://htdraw.com/how-to-draw-a-test-tube-step-by-step/

Please see the drawing tutorial in the video below
You can refer to the simple step-by-step drawing guide below
Step 1. Draw the mouth of the test tube
Begin by drawing two ovals to form the mouth of the test tube.
Step 2. Sketch the shape of the test tube
Outline the body of the test tube by drawing an elongated U shape.
Step 3. Add liquid chemicals
Add the liquid chemical into the test tube by drawing a U-shaped line following the shape of the tube. Then, draw a wavy horizontal line on top to represent the surface of the liquid.
Step 4. Sketch the scale
Mark the measuring scale on the side of the test tube by drawing evenly spaced horizontal lines to represent the measuring lines.
Step 5. Draw bubbles
Draw bubbles coming out of the test tube by drawing circles of different sizes.
Step 6. Complete the test tube drawing
Make your test tube drawing lively and interesting! Use a light blue pencil to color the tube, giving it a transparent appearance. Then, use a pink pen to fill in the bubbles and liquid inside the tube.
You can see more drawings:
- https://htdraw.com/wp-content/uploads/2024/04/How-to-draw-a-Test-Tube.jpg - https://htdraw.com/how-to-draw-a-test-tube-step-by-step/
Nhận xét
Đăng nhận xét